
Quick Start Guide
Overview
Welcome to Gorilla's Quick Start Guide.
If you don't yet know what Gorilla is or why you should use it, or you want more high-level information on what Gorilla can do, check out our Getting Started Webinar.
If you already know about Gorilla and are ready to start building, you're in the right place!
Follow the six simple steps below - in 5 minutes, you'll understand the essentials of how Gorilla works and will have a basic experiment you can build from.
Step 1: Create an Experiment
Step 1: Create an Experiment
Sign up for a Gorilla account.
Then, log in to your Gorilla account.
A welcome panel appears, introducing you to how Gorilla works. Click Start Building.
Gorilla automatically creates a new Experiment for you. Welcome panels appear, introducing you to Experiment Builder. Click through these, then click Finish.
If you already have a Gorilla account:
- Log in.
- Under My Work at the top left, click My First Experiment.
- If you don't see it, click See All Projects -> My First Project -> My First Experiment.
Your new experiment opens in Experiment Builder.
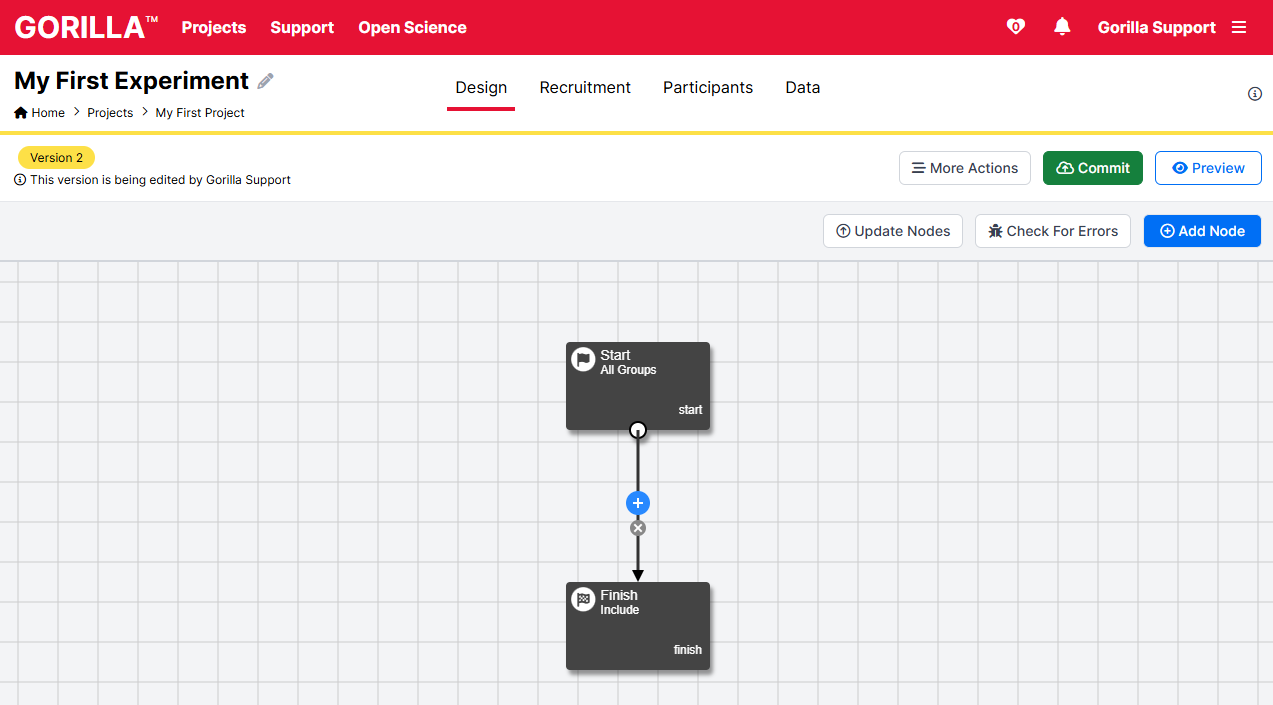
Participants enter the experiment at the Start Node and exit at the Finish Node. We're now going to add some activities for them to do in between.
In a real experiment, we might also want to add randomisation between conditions, counterbalancing, or conditional branching to different paths based on participants' answers. For more information on how to do this, check out our Experiment Builder guides.
See Also
Step 2: Add a Questionnaire
Step 2: Add a Questionnaire
Gorilla works at two levels.
Experiments are the overall flow of a study. Participants enter, go through activities, and exit.
Activities are the questionnaires and tasks you want your participants to do.
Activities are nested inside experiments. Create an experiment first, then add the activities you want inside it.
If you followed the previous step, your experiment is open in Experiment Builder.
Click the blue plus button between the Start and Finish nodes to add your first activity.
Click Questionnaire. Under Use Existing Questionnaire, click the down arrow next to My First Project.
In the Search box, type Starter Activities. Click Starter Activities under Samples below.
Starter Questionnaire appears. Click it, then scroll down and click Confirm. This clones (i.e. copies) the questionnaire into your project. The questionnaire appears in the experiment between the Start and the Finish Node.
Click Edit in the Starter Questionnaire (Clone) settings. This opens your copy of the Starter Questionnaire for editing in Questionnaire Builder 2.
Auto-update
By default, new activity nodes you add to your experiment are set to Auto-update.
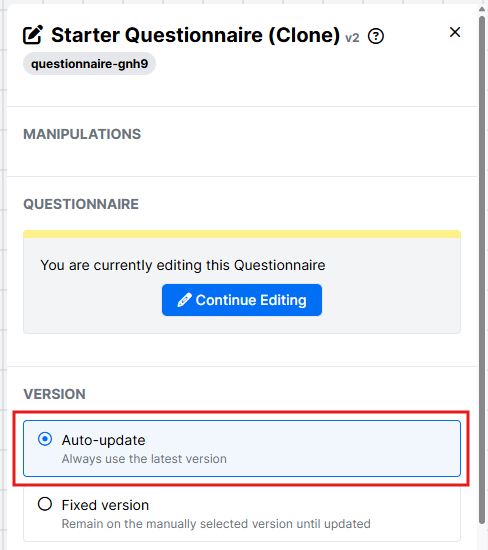
This means the version in your experiment reflects the latest version of the activity, including changes you are currently making.
For more information on activity nodes in experiments and how to control which version they use, see our Updating Your Nodes guide.
See Also
Searchable Samples Library (requires Gorilla account)
Step 3: Edit the Questionnaire
Step 3: Edit the Questionnaire
Click on Page 1 of the questionnaire, then on Page 2. Page 1 is a standard consent form. Page 2 currently has one question about the participant's first language.
On Page 2, add another question by clicking Add Object:
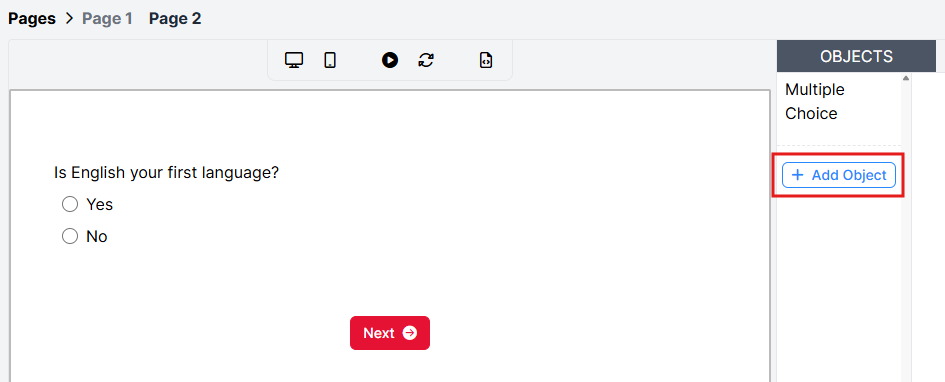
Choose a question type and click Create. Enter options and play around with the settings.
The Response setting defines what will be recorded in your data if the participant selects that option.
To preview what your questionnaire looks like for a participant, click Preview at the top right:
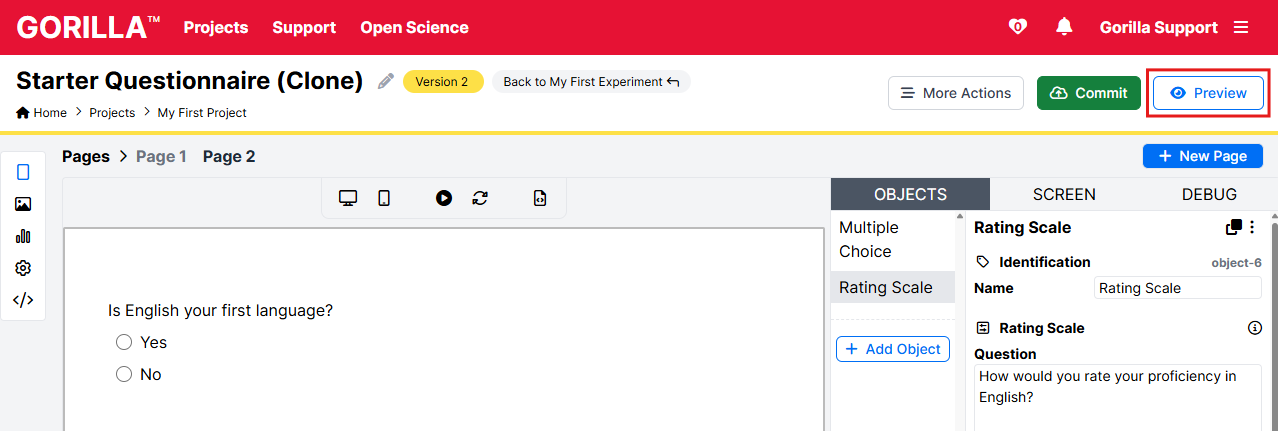
At the end of the preview, click Back to Editor.
If your research only involves surveys, skip to 6: Commit the Experiment. Otherwise, continue with the next step to add and edit a task.
See Also
Questionnaire Builder 2 Step by Step - how to build a questionnaire from scratch
Questionnaire Builder 2 Objects Guide - reference guide to all Questionnaire Builder 2 objects
Questionnaire Builder 2 Tutorials - video walkthroughs of specific features
Step 4: Add a Task
Step 4: Add a Task
Task Builder 2 is ideal for creating any kind of reaction-time task. Reaction time data is saved automatically to your data along with participants' responses.
From your Starter Questionnaire, click the 'Back to My First Experiment' button to return to your experiment.

Click the blue plus button between your Simple Questionnaire and the Finish Node. Click Task.
Under Use Existing Task, click the down arrow next to My First Project.
In the Search box, type Starter Activities. Click Starter Activities under Samples below.
Starter Task appears below. Click it, then scroll down and click Confirm. This clones (i.e. copies) the task into your project. The task appears in the experiment between the Starter Questionnaire and the Finish Node.
Click Edit in the Starter Task (Clone) settings. This opens your copy of the Starter Task for editing in Task Builder 2.
Welcome panels appear, introducing you to Task Builder. Click through these, then click Finish.
See Also
Searchable Samples Library (requires Gorilla account)
Understanding and Adapting Sample Tasks
Step 5: Edit the Task
Step 5: Edit the Task
The first thing you see in Task Builder is Displays View. This shows you the visual layouts participants will see during the task.
Click each screen in the Instructions, Trial, and Debrief displays.
- The Instructions display shows some instructions and a Next button.
- The Trial display shows a fixation cross (Screen 1), then an image and two response options (Screen 2).
- The Debrief display shows some placeholder debrief text and a Finish button.
To see how these are used in the flow of the task, click Spreadsheets in the left sidebar:
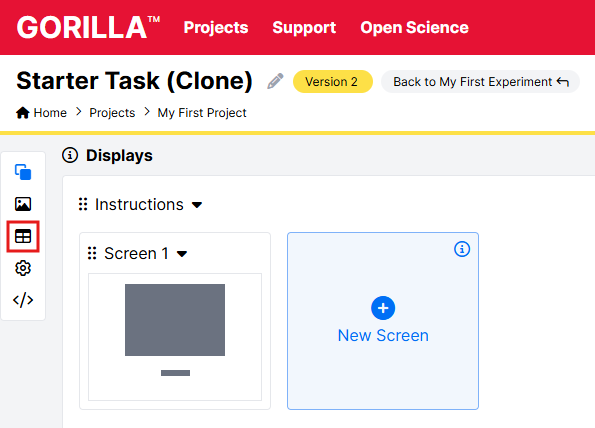
Panels appear introducing you to the spreadsheet. Click through these, then click Finish.
Look at the display column. This contains, from top to bottom, the displays that will be shown to the participant from the beginning to the end of the task.
Right now, there is only one Trial - let's add another one by clicking the plus button next to the Trial row and selecting 'Add Row Below':
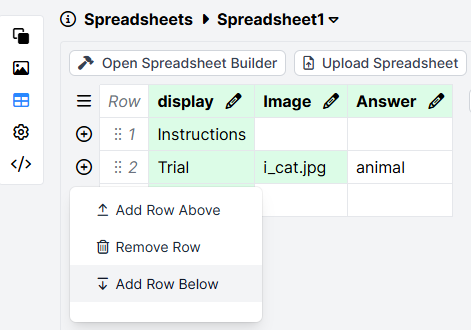
This creates a blank row in the spreadsheet. In the display column, enter Trial. This tells Gorilla to show the Trial display again a second time.
In the Image column, enter i_carrot.jpg. The cell goes green. This means the filename matches an image uploaded to the task's Stimuli. You can check this by clicking Stimuli in the left sidebar.
In the Answer column, enter plant. This is the correct answer for this trial.
The Image and Answer columns are bound to the Image and Scorer components on Screen 2 of the Trial display. Gorilla pulls this information from the spreadsheet to show the right image and set the right correct answer for each trial.
With a real task, it's easier to make changes by clicking 'Download Spreadsheet', editing it outside of Gorilla, and clicking 'Upload Spreadsheet' to upload your changes.
Play around with the settings and change anything else you'd like to in the task.
To preview what your task looks like for a participant, click Preview at the top right:
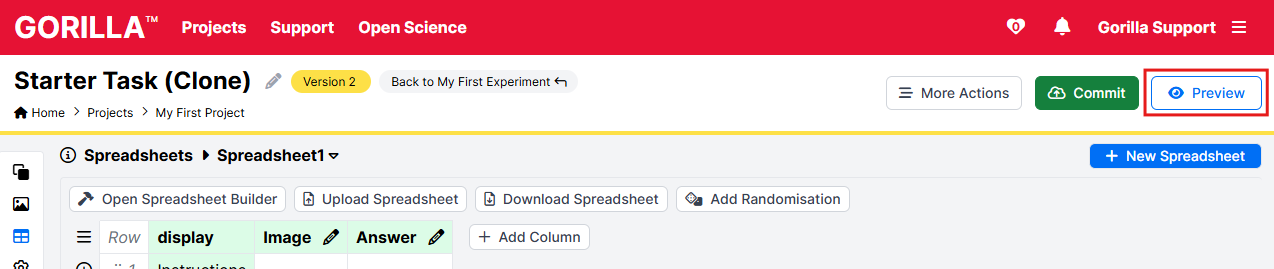
At the end of the preview, click Back to Editor.
See Also
Spreadsheet Walkthrough - how to change stimuli, response options, and correct answers from trial to trial
Randomisation Walkthrough - how to randomise content in your task
Task Builder 2 Step by Step - how to build a task from scratch
Task Builder 2 Objects Guide - reference guide to all Task Builder 2 objects
Task Builder 2 Tutorials - video walkthroughs of specific features
Step 6: Commit the Experiment
Step 6: Commit the Experiment
Click the 'Back to My First Experiment' button to return to your experiment.

To preview your whole experiment from the participant's point of view, click Preview at the top right:
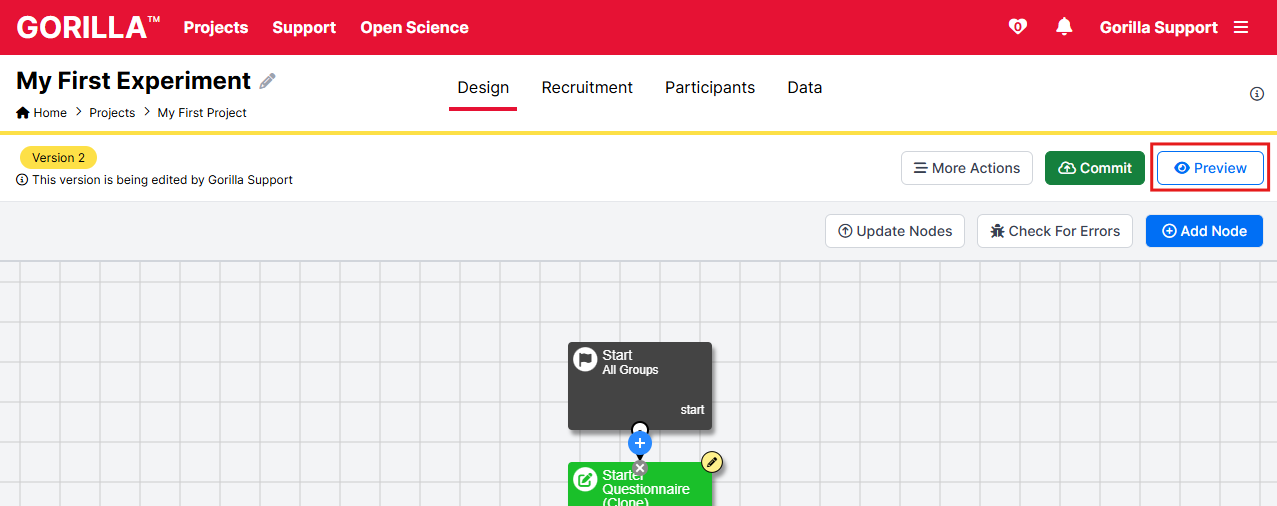
At the end of the preview, a data download screen appears:
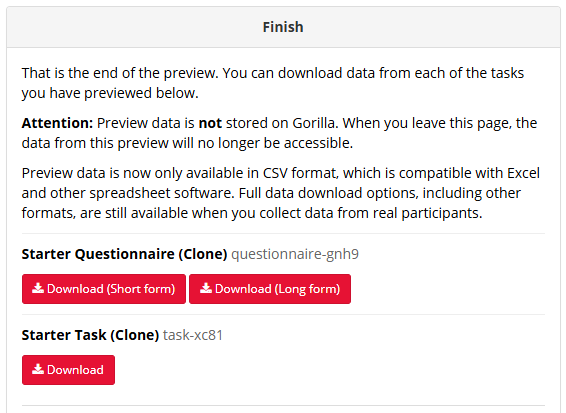
Download the questionnaire and task data and open it. This is what the data from real participants will look like once you launch your study.
Once you've checked the data, click Back to Editor.
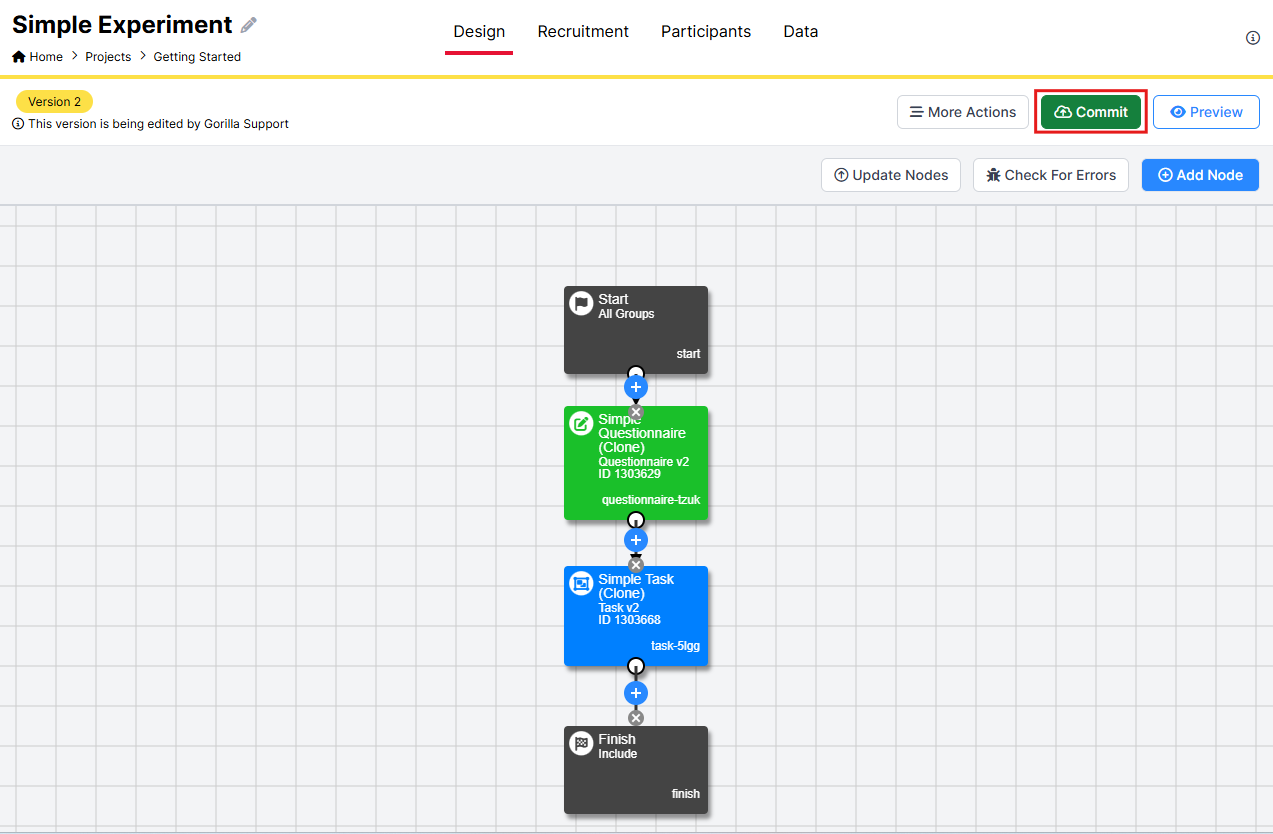
If you're happy with how everything looks, click Commit at the top right:
Enter an informative description of the change you made and click Commit.
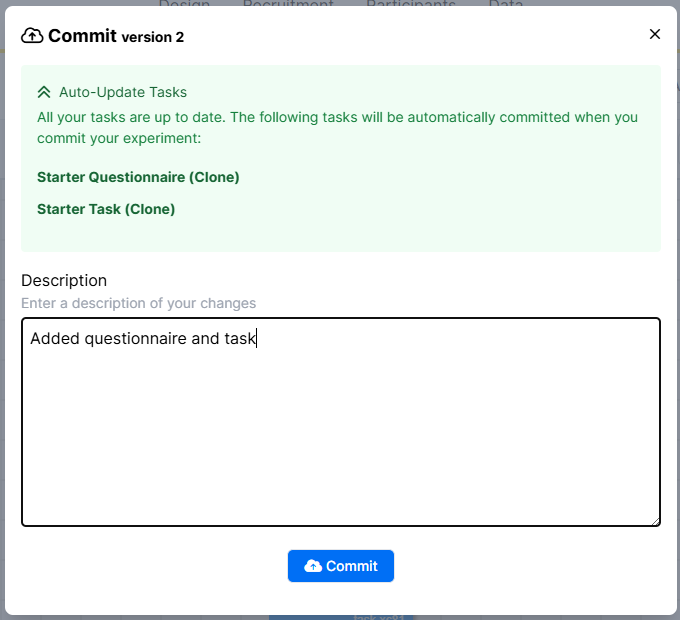
Committing saves this version of the experiment so you can always go back to it if you make a mistake. It also saves the changes you've made to the questionnaire and the task.
You've built a simple experiment in Gorilla! In the process, you've learnt the basics of how the Experiment Builder, Questionnaire Builder, and Task Builder work, and got a peek at the data you'll get from participants.
Next:
- Finish building your own study, using the experiment you've made as a template. If you get stuck:
- Try our Troubleshooting Guide
- Check out the links in See Also sections of this guide
- Preview your experiment. Check everything's working and the data are recording correctly.
- Commit the final version of your experiment.
When you've completed these steps, you're ready to pilot your study with some real participants!
Participants don't need to download anything or create a Gorilla account - they access the study via a link that you send to them. Check out our recruitment policies guide to find out more.